Disclaimer: This post may contain affiliate links which means I may receive a small commission from purchases made through links. However, these are products that I would wholeheartedly recommend to my family and friends regardless if I make a small commission at no cost to you as a consumer.
Introduction
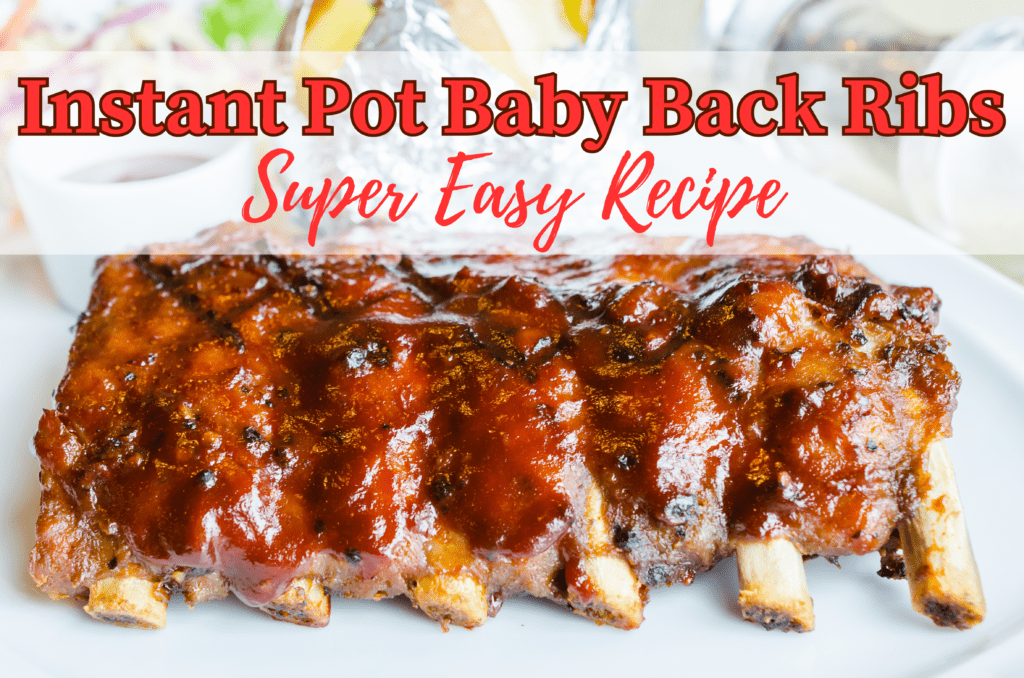
Welcome to the world of tender, juicy, and delectable baby back ribs, made effortlessly with the help of an Instant Pot pressure cooker. If you’ve been searching for a foolproof ribs recipe that saves you time and energy without compromising on flavor, you’ve landed in the right place.
This Instant Pot baby back ribs recipe offers a perfect blend of spices, succulent meat, and a delightful barbecue sauce glaze, all prepared in a fraction of the time it takes using traditional methods. By harnessing the power of pressure cooking, the Instant Pot transforms a rack of ribs into a mouthwatering feast that will leave you craving more.
In this article, we’ll dive deep into the reasons why the Instant Pot is the ultimate game-changer for cooking baby back ribs and guide you step by step through this irresistible recipe. So, let’s jump in and discover how to create unforgettable ribs that will have your family and friends coming back for seconds.
Why Choose Instant Pot for Baby Back Ribs
The Instant Pot is a versatile kitchen gadget that combines pressure cooking and slow cooking into one convenient appliance. It’s perfect for cooking ribs because the pressure cooking method quickly tenderizes the meat while locking in the flavors, cutting down on the overall cooking time.
Adapting the Recipe for Other Pork Rib Cuts
This Instant Pot baby back ribs recipe can also be adapted for other types of pork ribs, such as St. Louis-style or country-style ribs. The key to success is adjusting the pressure cooking time to accommodate the different cuts. For instance, St. Louis-style ribs are meatier and may require a slightly longer cooking time, while country-style ribs could take even longer due to their higher fat content. As a general rule, add an extra 2 to 3 minutes to the pressure cooking time when using different rib cuts. This will ensure tender, flavorful results that highlight the versatility of the Instant Pot in preparing various types of pork ribs.
Ingredients
To make these Instant Pot baby back ribs, you’ll need the following ingredients:
Ribs
- 1 rack of baby back ribs, about 3-4 lbs
Dry Rub
- 1/4 cup brown sugar
- 2 tsp paprika
- 1 tsp garlic powder
- 1 tsp onion powder
- 1 tsp salt
- 1/2 tsp black pepper
- 1/2 tsp cayenne pepper (optional)
Sauce
- 3/4 cup barbecue sauce, store-bought or homemade
Liquid
- 1 cup apple juice or water
- 1/2 cup apple cider vinegar
- 1/4 tsp liquid smoke (optional but highly recommended)
Preparing the Ribs
Before cooking the ribs, you’ll need to do some prep work.
Removing the Membrane
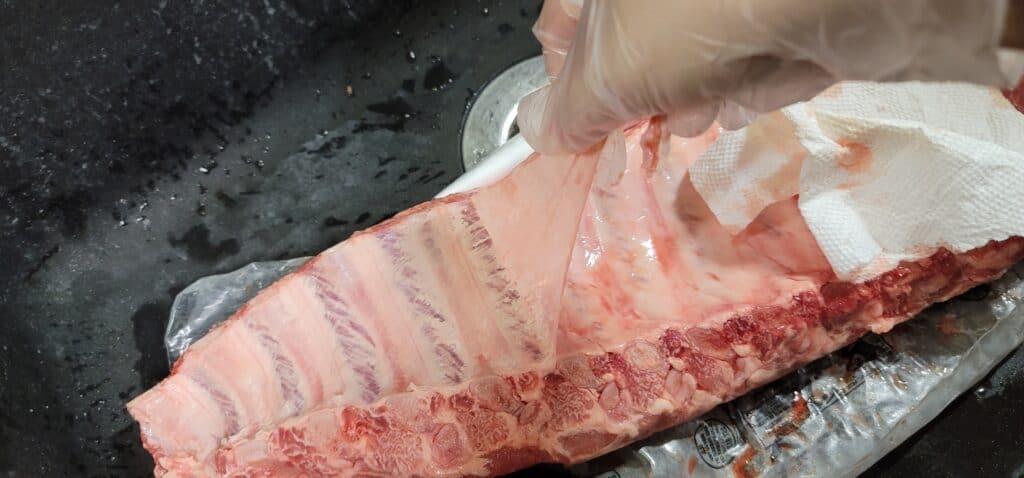
Before you start cooking your baby back ribs, it’s essential to remove the membrane, a thin, silvery layer of connective tissue on the bone side of the ribs. This step is crucial because the membrane can become tough and chewy when cooked, detracting from the tenderness of the ribs. Additionally, removing the membrane allows the dry rub to better penetrate the meat, infusing it with even more flavor.
To remove the membrane, start by laying the ribs bone-side up on a cutting board. Using a butter knife or the tip of a meat thermometer, gently slide it under the membrane at one end of the ribs, being careful not to pierce the meat. Once you’ve created a small opening, use a paper towel or a clean cloth to grip the membrane. This will provide better traction, as the membrane can be quite slippery. Gently pull the membrane away from the ribs, working your way from one end to the other.
If the membrane tears while you’re pulling, simply use the knife to create a new opening and continue the process until the entire membrane is removed. With the membrane gone, your ribs are now ready to absorb the flavors of the dry rub and cook to tender perfection.
Applying the Dry Rub
Once you’ve removed the membrane, the next crucial step in creating flavorful baby back ribs is applying the dry rub.
First, be sure to pat the ribs dry using paper towels. This will help the dry rub adhere better to the meat and ensure that the ribs have a consistent coating of the flavorful mixture. In a small bowl, combine all the dry rub ingredients, and mix them well to create a harmonious blend of flavors.
Now, it’s time to apply the dry rub to the ribs. Spread a generous amount of the mixture onto both sides of the rack, making sure to press and massage the rub into the meat. This will help the flavors penetrate deeper, resulting in a more robust and delicious taste. Don’t be afraid to use your hands to get up close and personal with the ribs – this hands-on approach ensures even coverage.
For the best possible flavor, consider preparing the ribs with the dry rub the night before you plan to cook them. This will allow the spices and seasonings to fully infuse the meat overnight, creating an even more intense and mouthwatering flavor profile.
Simply wrap the seasoned ribs in plastic wrap or aluminum foil and store them in the refrigerator until you’re ready to cook. By giving the dry rub ample time to work its magic, you’ll elevate your baby back ribs to new heights of deliciousness.
While allowing the dry rub to marinate the ribs overnight is ideal for achieving maximum flavor, don’t worry if you don’t have the luxury of time. Even if you’re unable to let the ribs marinate for an extended period, the Instant Pot’s pressure cooking process will still help to infuse the meat with the dry rub’s delicious flavors.
In fact, many people find that the difference in taste between marinated and non-marinated ribs is minimal, especially when using the Instant Pot. So, rest assured that you can still create a mouthwatering meal even if you’re short on time.
Cooking the Ribs
Now that the ribs are prepped, it’s time to cook them in the Instant Pot.
Pressure Cooking
Once your ribs are prepped and ready, it’s time to move on to the pressure cooking phase, which is the key to achieving tender, fall-off-the-bone ribs in the Instant Pot.
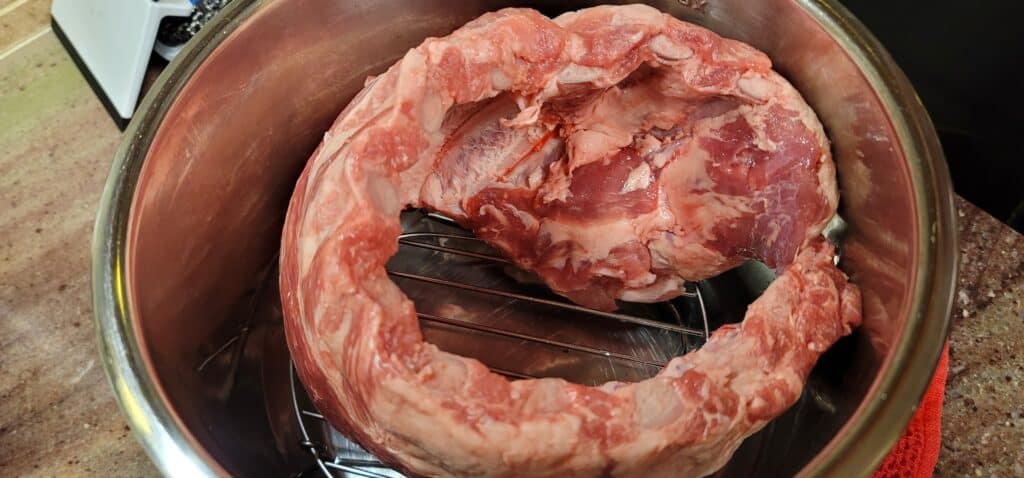
Start by placing the trivet inside the Instant Pot, creating a stable base for the ribs to sit on and keep the ribs out of the liquid. If you do not have a trivet, ball up some foil to hold up the ribs.
Then, pour in the apple juice or water, apple cider vinegar, and liquid smoke if using, which will help to generate the necessary steam for pressure cooking and add a touch of flavor to the ribs.
When it comes to positioning the ribs inside the Instant Pot, you have a couple of options.
You can either coil the entire rack of ribs around the inside of the pot, standing them up on their side, or you can cut the ribs into smaller sections for easier handling.
Whichever method you choose, it’s important to ensure that the thicker side of the ribs is facing downward, toward the bottom of the Instant Pot. This allows the thicker, meatier sections to cook more evenly and absorb more heat, resulting in perfectly cooked ribs throughout.
Once the ribs are properly positioned, close the Instant Pot lid securely, making sure that the pressure release valve is set to “sealing.” Then, program the Instant Pot to cook on high pressure for 25 minutes.
As the pressure builds, the ribs will cook quickly and efficiently, allowing the flavors of the dry rub to penetrate the meat and creating the ultimate tender and juicy baby back ribs.
Natural Release
After the 25-minute pressure cooking time has elapsed, let the Instant Pot do a natural release for 15 minutes. This means allowing the pressure inside the pot to dissipate gradually, without manually opening the pressure release valve.
The natural release process is essential for ensuring that the ribs remain tender and juicy, as it allows the meat fibers to relax and reabsorb some of the cooking liquids.
Additionally, this method reduces the risk of hot steam spurting out from the pressure release valve, which can happen during a quick release. Once the 15-minute natural release period is complete, you can proceed with the next steps in the recipe, ensuring that your baby back ribs are cooked to perfection.
Quick Release
Once the 15 minutes of natural release is up, if there is any pressure remains, carefully perform a quick release by turning the pressure release valve to “venting.” Make sure to use a towel or oven mitt to protect your hand from the steam. When the pressure has fully released and the pin drops, carefully open the Instant Pot lid.
For more information on how to operate an instant pot, check out this video.
Finishing Touch
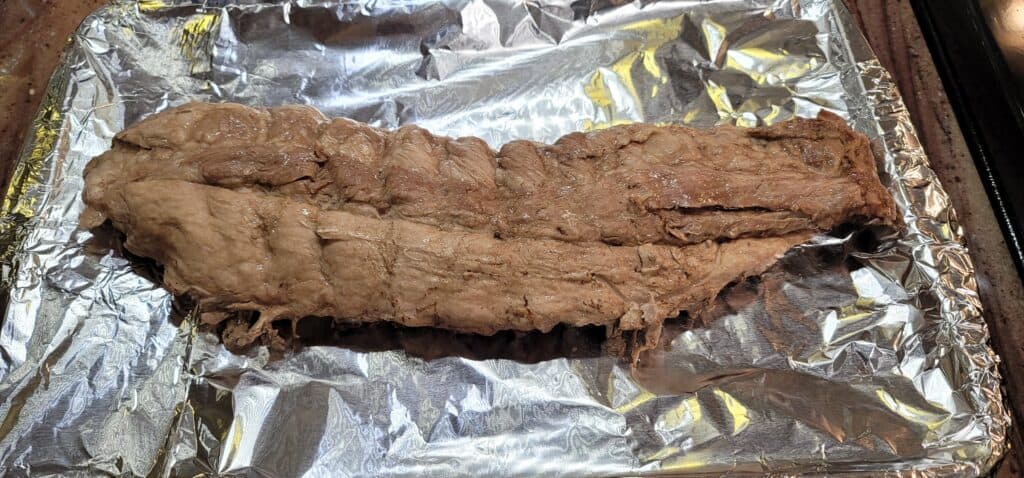
At this point, your baby back ribs might not look like anything good. To give your ribs the perfect finishing touch, you’ll want to glaze and broil them with your favorite sauce.
Remove the ribs from the Instant Pot using 2 tongs (since they are more delicate and could fall apart easily) and place them on a foil-lined baking sheet. If your ribs are too long to fit on the baking sheet, you can cut them into smaller sections.
Glazing with Sauce
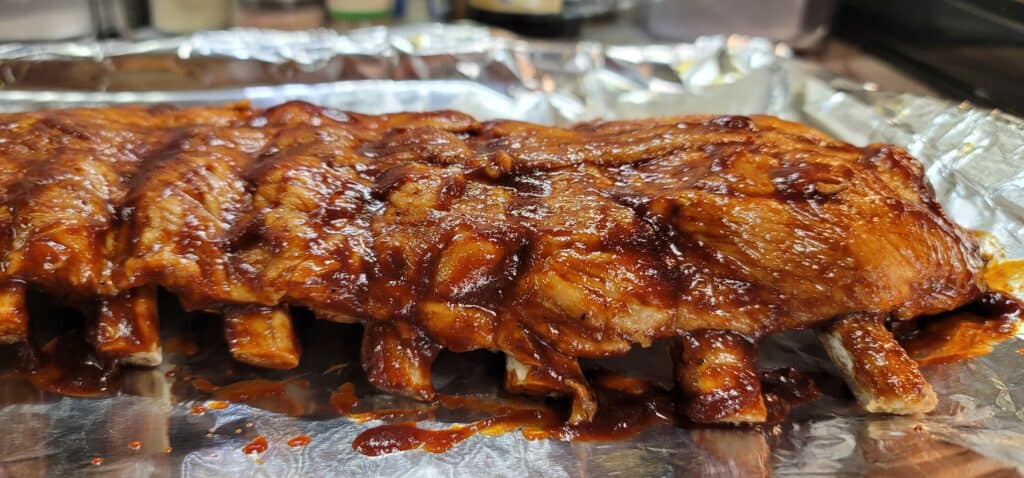
Brush the ribs generously with your chosen barbecue sauce. The key is to strike the perfect balance in terms of quantity. You want to ensure that the sauce is generously applied to cover the entire surface of the ribs and their sides, enveloping the meat in a rich and flavorful layer. However, be mindful not to use an excessive amount of sauce that would cause the ribs to drown in it.
Too much sauce can overpower the taste of the tender, seasoned meat and create a messy eating experience. By applying just the right amount of sauce, you’ll achieve a harmonious blend of flavors that complements the succulent baby back ribs, leaving your taste buds craving more.
Initially just glaze one side of the rib since we will be flipping them over later to glaze again.
Broiling
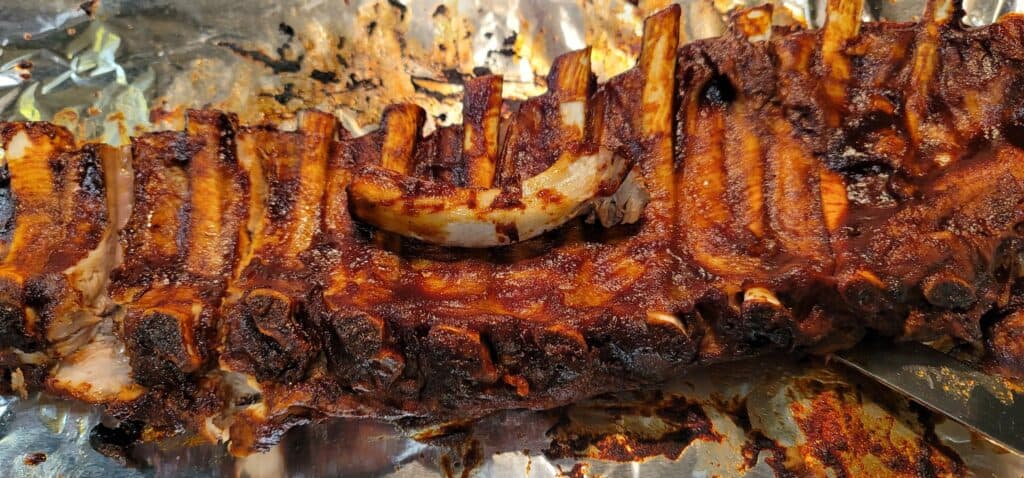
Preheat your oven’s broiler to get ready for the final touch on your ribs. To achieve really crispy edges, place the oven rack at the top position, closer to the broiler. If you prefer a less crispy finish, position the oven rack on the second level, ensuring that the ribs won’t burn too quickly.
Broil ribs for 3-5 minutes, or until the sauce starts to caramelize and bubble. It’s important to keep a close eye on the ribs during this process, as they can burn rapidly.
Once the top side is caramelized to your desired level, remove the ribs from the oven, flip them over, and apply sauce to the other side. Broil the other side of the ribs for an additional 3-5 minutes, monitoring the caramelization closely.
Remove the ribs from the oven once you’re satisfied with the level of crispiness on both sides. Allow the ribs to rest for a few minutes before serving, giving the flavors time to settle and further enhancing the overall taste of your delicious baby back ribs.
Conclusion
This Instant Pot baby back ribs recipe is a surefire way to impress your family and friends with tender, flavorful ribs that require minimal effort. The Instant Pot makes it easy to achieve perfect ribs in a fraction of the time it takes using traditional cooking methods. So go ahead and enjoy those fall-off-the-bone ribs, knowing you’ve unlocked the secret to a quick, delicious meal.
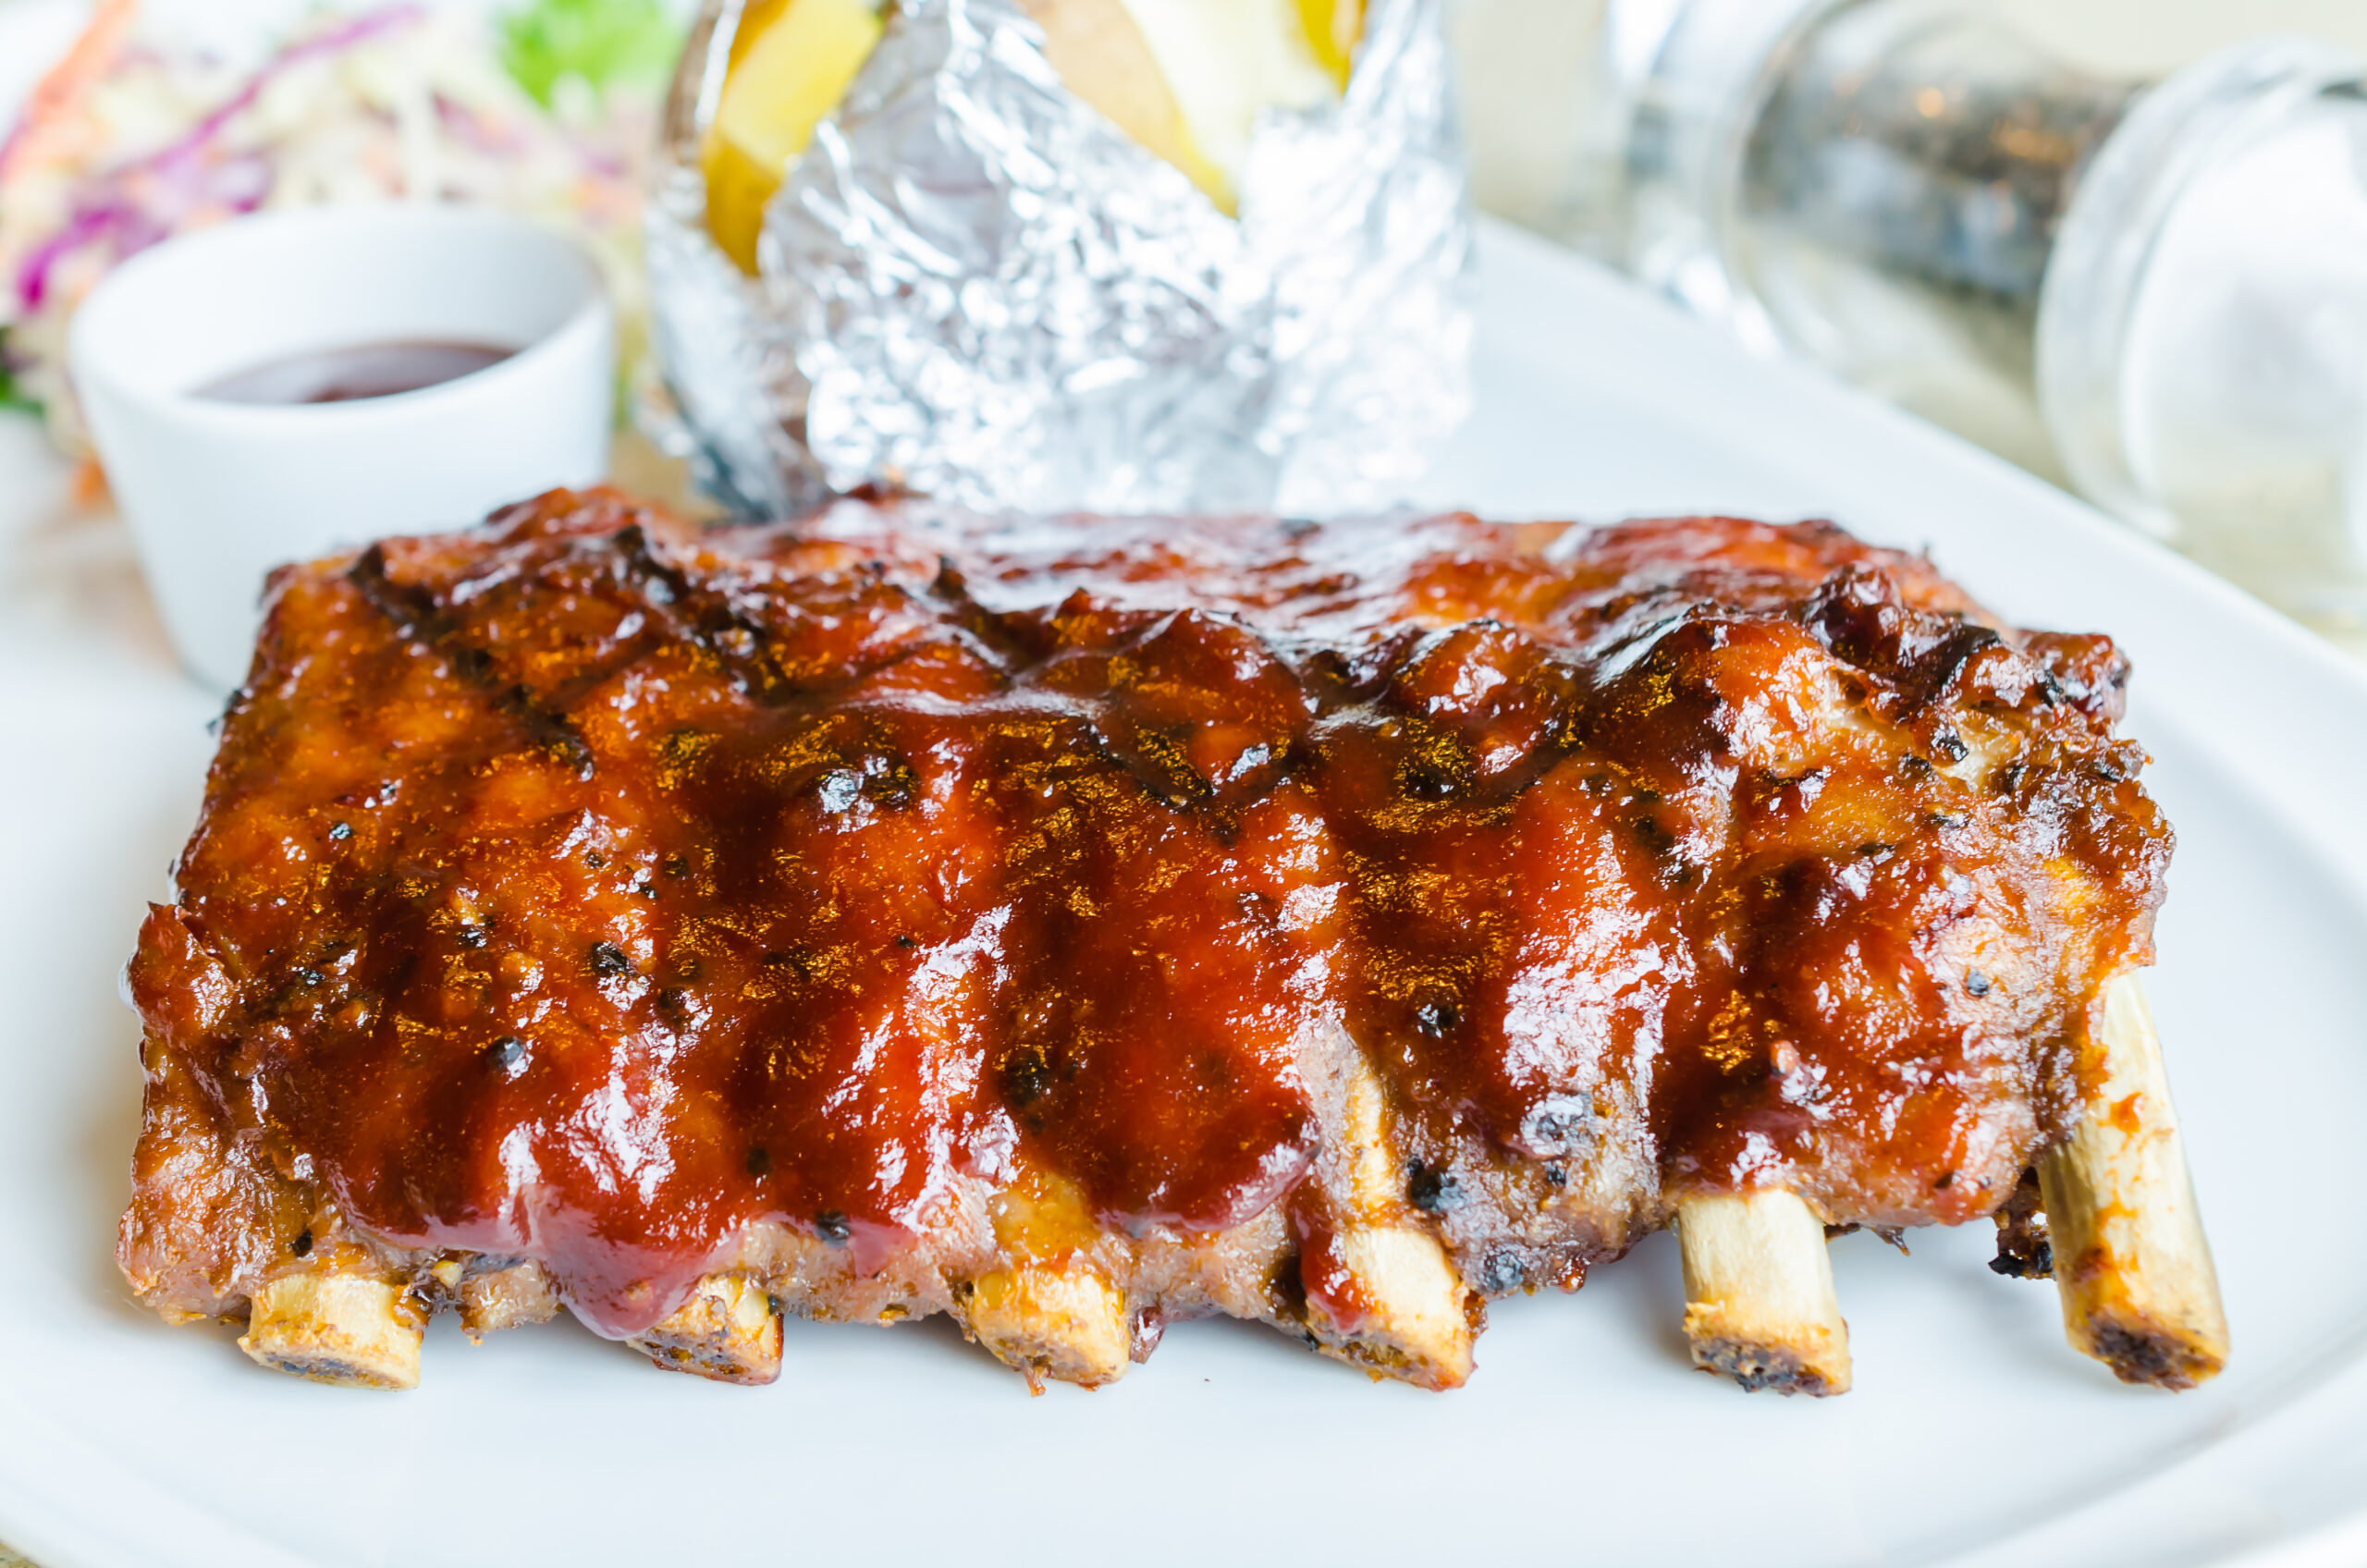
Instant Pot Baby Back Ribs
Equipment
- 1 Instant Pot
- 2 Tongs
- 1 Trivet
- 1 Foil-lined Cookie Sheet
Ingredients
Meat
- 3-4 lbs Baby back ribs or other pork ribs
Dry Rub
- 1/4 cup Brown sugar
- 2 tsp Paprika
- 1 tsp Onion powder
- 1 tsp Salt
- 1/2 tsp Black pepper
- 1/2 tsp Cayenne pepper (optional)
Sauce
- 3/4 cup BBQ sauce (home made or store bought)
Liquid for the instant pot
- 1 cup Apple juice or water
- 1/2 cup Apple cider vinegar
- 1/4 tsp Liquid smoke (optional but highly recommended)
Instructions
Preparing pork rib
- Clean and pat dry pork rib.
- Remove membrane from the bottle of the rib by gripping it with a paper towel and tear it out.
Dry Rub
- Combine dry rub ingredients in a small bowl and mix well. Apply dry rub generously to both sides of the pork ribs. Pad it tight with your hand.
Pressure Cooking
- Place the trivet into the bottle of the instant pot. Pour in liquid (apple juice or water, apple cider vinegar, and liquid smoke if using.)
- Place pork rib onto the trivet standing up in a coiled position (with the thicker side towards the bottom.)
- Close the lid, turn pressure nob to sealing position.
- Set to high pressure with cook time of 25 minutes. After that, natural-release for 15 minutes. If there's any pressure left after that (the pin hasn't dropped) then quick-release the remaining pressure.
- Remove ribs with 2 sets of tongs onto foil-lined cookie sheet, laying flat.
Broiling
- Brush BBQ sauce onto the ribs generously.
- Place ribs under the broiler for 3-5 minutes until desired crispness.
- Remove from oven and flip pork rib to the other side.
- Repeat from step 1 on the other side.
You will also like these easy recipes:
Frequently Asked Questions (FAQs)
Can I double the instant pot ribs recipe?
Yes, you will need to double the dry rub seasoning and BBQ sauce. The amount of liquid going into the bottle of the instant pot should stay the same. Increase pressure cooking time by 8 minutes.
Why are my ribs tough in Instant Pot?
The reason is the ribs weren’t cooked long enough. The pressure cooking time depends on the cut of the rib (baby back, spare rib, St. Louis, etc.) and its size.
How much liquid do you put in the ribs in an Instant Pot?
As a rule of thumb, an instant pot will need at least 1 cup of liquid to create the pressure needed.
Can I use spare ribs instead of baby back ribs?
Yes, you can use spare ribs in this recipe. However, spare ribs are larger and may require a longer cooking time. Try pressure cooking for 30-35 minutes instead.
Can I use a different type of liquid for pressure-cooking the ribs?
Yes, you can experiment with different liquids, such as beer, cola, or broth, to add different flavors to your ribs.
How can I make my own barbecue sauce for this recipe?
You can make a simple homemade barbecue sauce by combining ketchup, brown sugar, apple cider vinegar, Worcestershire sauce, and your favorite spices in a saucepan. Simmer the mixture until it reaches your desired consistency.
Can I cook frozen ribs in the Instant Pot?
Yes, you can cook frozen ribs in the Instant Pot. However, you’ll need to increase the cooking time. Try pressure cooking for 30-35 minutes instead.
Can I store leftover cooked ribs?
Yes, you can store leftover ribs in an airtight container in the refrigerator for up to 4 days. Reheat them in the oven at 350°F for about 15 minutes or until heated through.



Wow, these look delicious! Can’t wait to try this recipe, pinning it for future reference!
This is a great recipe! Thanks!
This Instant Pot baby back bibs recipe looks amazing! I love that’s it’s easy and uses the Instant Pot. I LOVE mine – it’s such a handy appliance. Looking forward to making it!